
How to Make Mermaid Tail Chocolates
Would you like to learn how to make mermaid tail chocolates?! We've been having fun with our new mermaid tail candy molds and thought a mermaid tail chocolate tutorial would be something you'd enjoy. Chocolate mermaid tails are perfect for decorating a mermaid birthday party cake, mermaid cupcakes or to package up for party favors. You can also give them out as gifts to those who have a mermaid soul.

Supply List to Make Mermaid Tail Chocolates:
white chocolate candy melts
flat baking pan
Everclear grain alcohol or cake decorators rose spirits
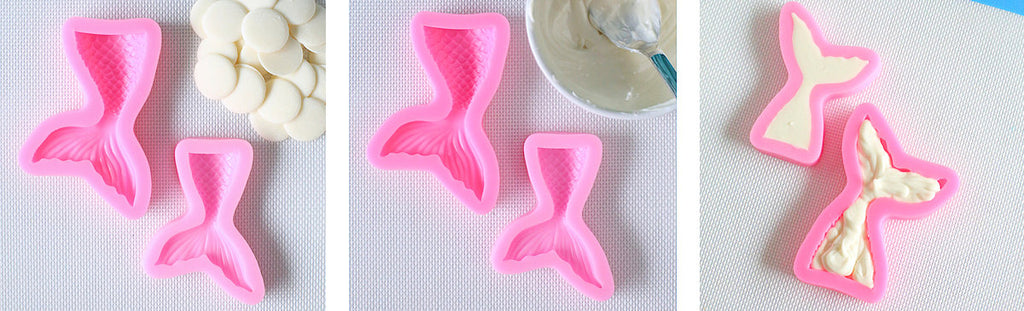
Step 1: Getting Started
Melt a small batch of white chocolate candy melts being careful not to over heat, see tip below. Base how much you melt by how many molds you are using at a time. If you are making one tail at a time melt around 1/4 cup.
TIP: When melting chocolate it is best to heat it low and slow. It can get clumpy, stiff or even scorched if you melt it to quickly or at too high of heat. Try heating it in the microwave for a minute on 40% power. Stir and repeat at 30 second intervals until it is melted. If you find your chocolate is still a little stiff you can add a very small amount of paramount crystals to the chocolate. This will thin it out and make more fluid to help the chocolate get in all the nooks and crannies of the mermaid tail mold.
Step 2: Chocolate Time
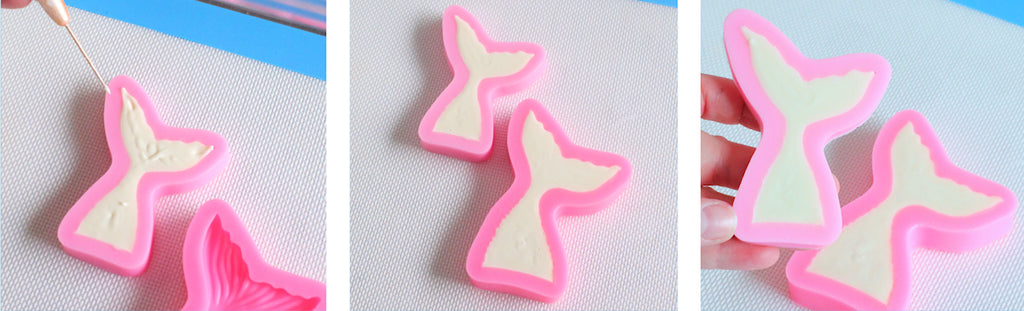
Place your mermaid tail candy mold on a flat baking pan. Having the pan lined with a silicone baking mat is helpful. Add your melted chocolate to a clear disposable piping bag and pipe into each candy mold trying not to overfill them. Use a cookie scribe to help get the chocolate into the narrow places on the mermaid tail. Then holding the pan level to a table tap the pan multiple times on the tabletop. This helps push out any air bubbles to the surface of the chocolate and helps all of the details of the mold get filled with chocolate.
Step 3: Unmolding Time
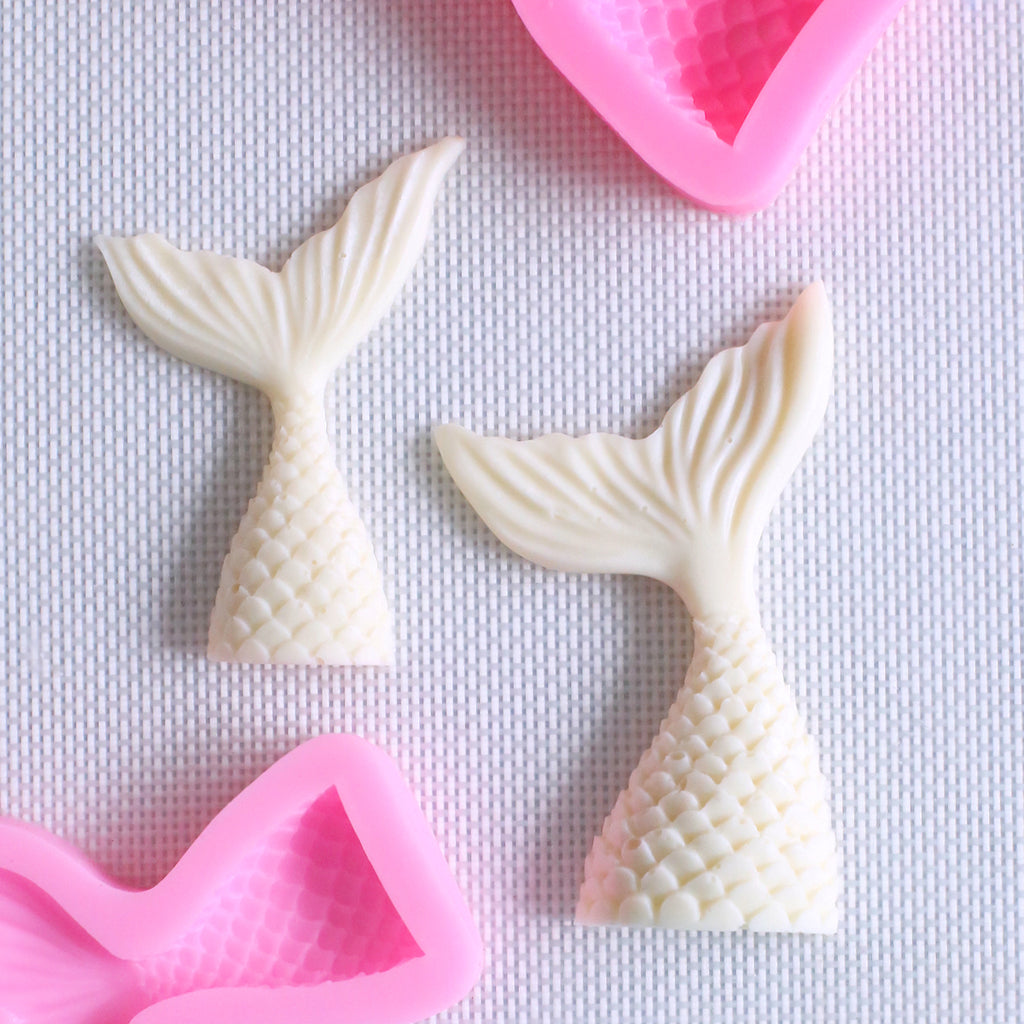
Allow the chocolate to fully set and harden. This is important because if you try to remove your chocolate from the mold too soon the chocolate will be soft and can break. To speed up the process you can place the baking pan holding the mermaid molds into the fridge or freezer for 10-20 minutes. Once fully set carefully remove them from the mold. To do this gently use your thumb to loosen the edge of the mold from the chocolate my going around the entire mold pulling away the mold. Then peel off the mold from the thick body part of the mermaid tail. Be careful not to put stress on the narrow part of the chocolate mermaid tail.
Step 4: Time to Decorate
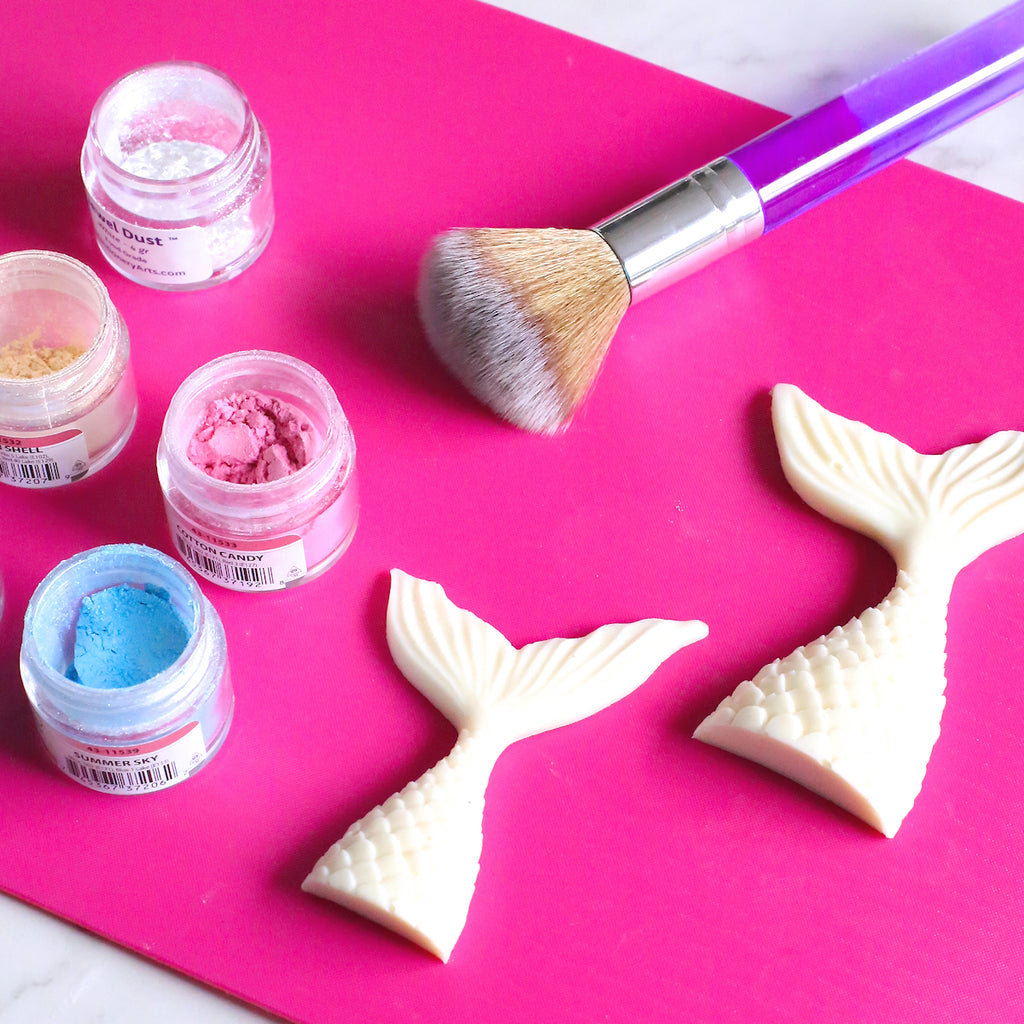
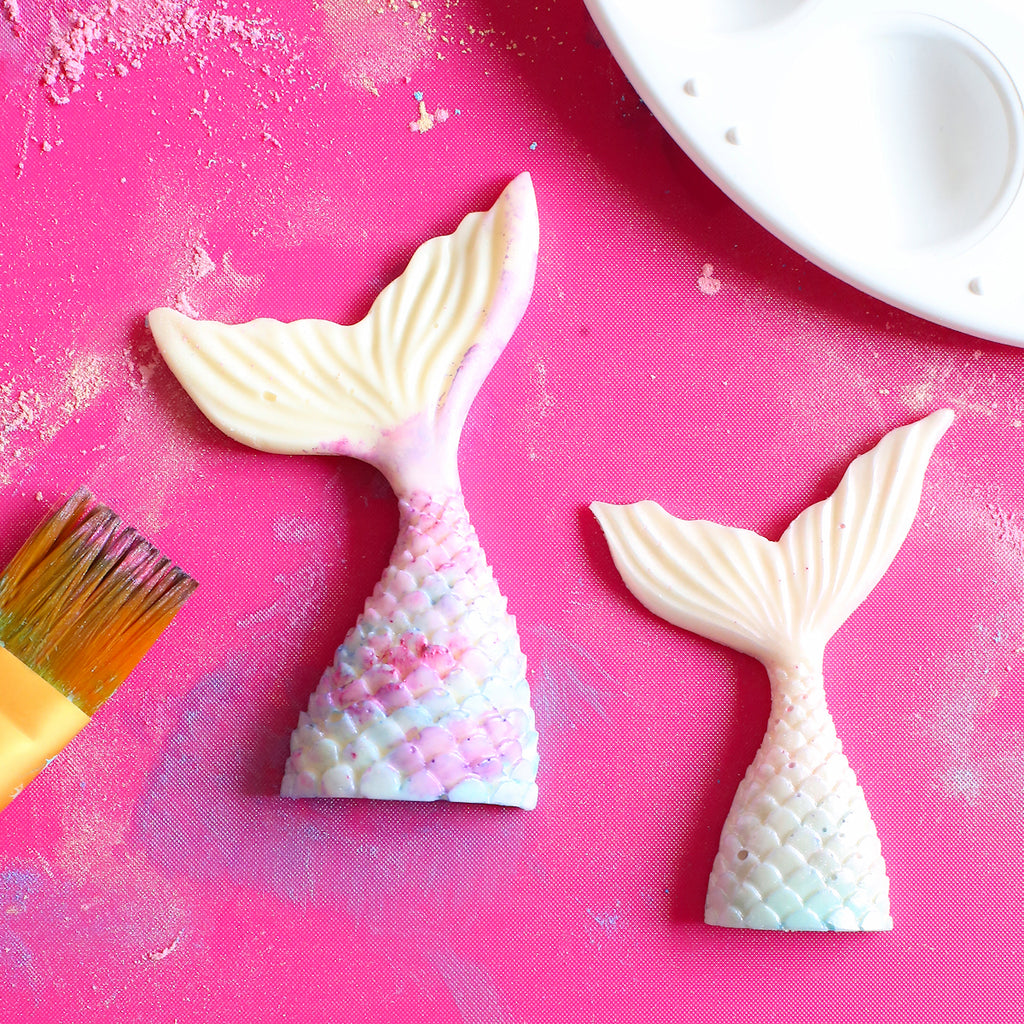
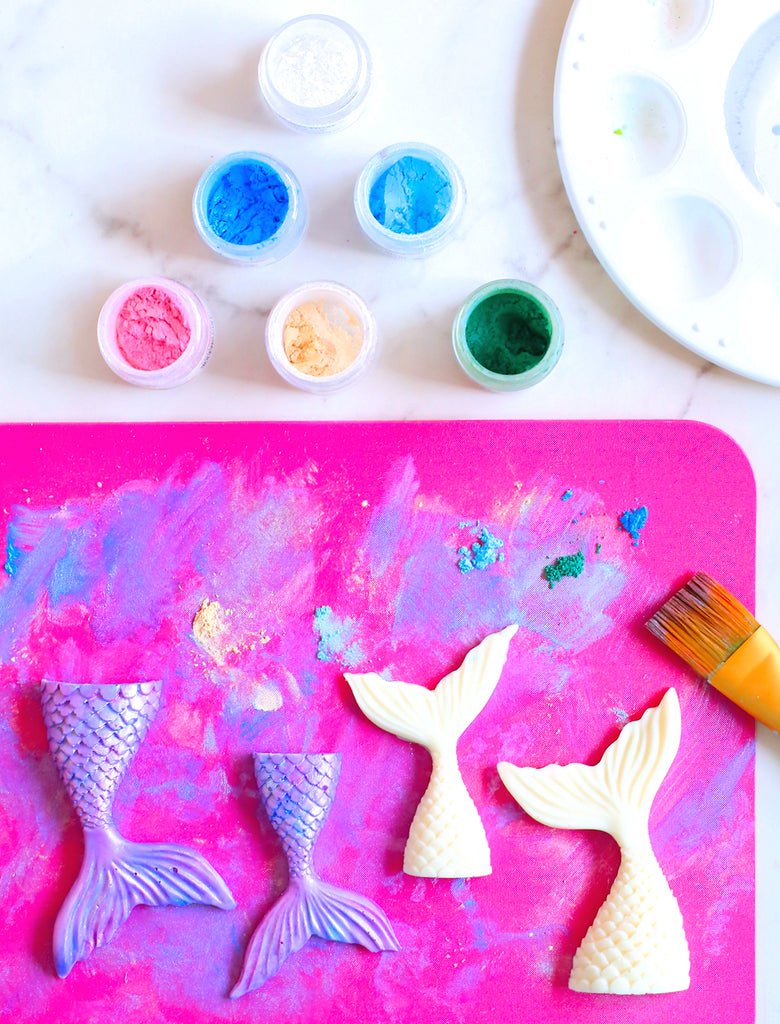
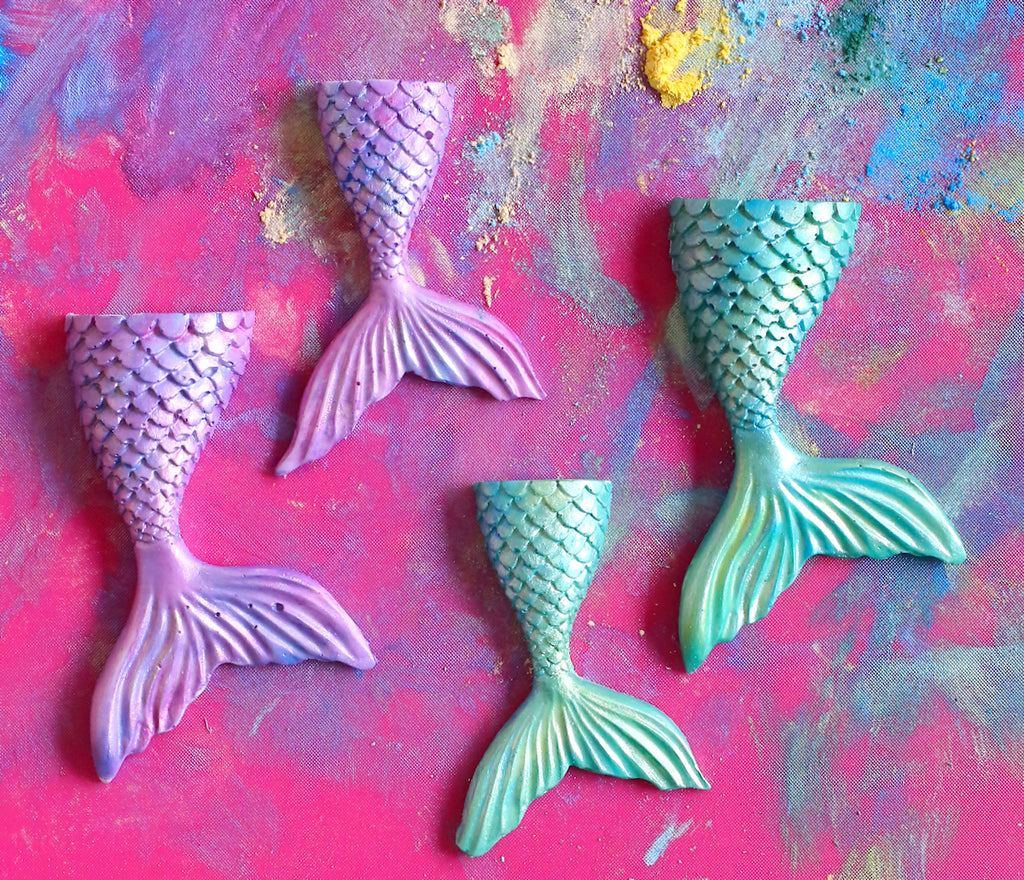
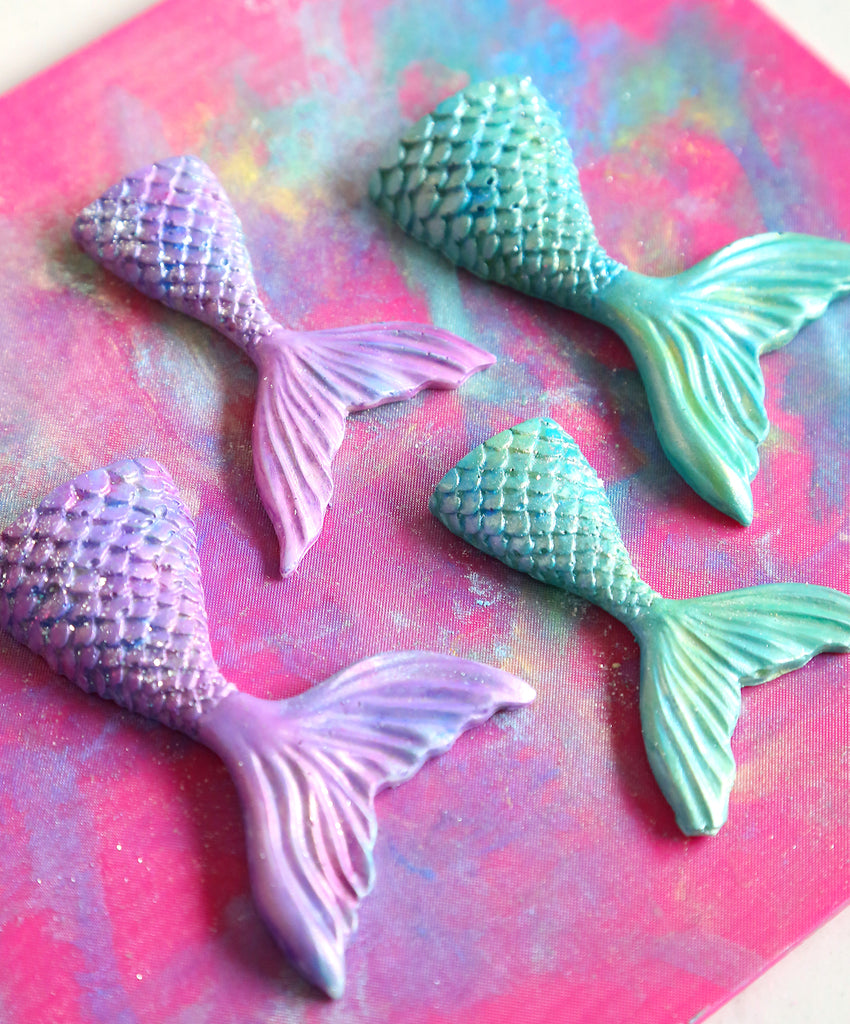
We painted the white chocolate mermaid tails with edible luster dust. This creates a beautiful shimmer and finish to the mermaid chocolates. For the purple colored mermaid tails we used cotton candy light pink luster dust, summer sky light blue luster dust, pool blue blue luster dust and oyster shell luster dust. Yes, you read that right, we did not use ANY purple luster dust yet they are purple! The 4 colors we selected create the purple color through the painting and layering process. It's magical, just like a mermaid!
Tip: When choosing colors for your mermaid chocolates we suggest 2 light colors with one being a nuetral (our neutral was oyster shell on the purple mermaid tails), a medium and a medium-dark. This helps create a variety of shades of colors which will give your chocolates some depth. Think about what the colors you select might look like when mixed together or wing it and see what happens!
Step 5: Time to Paint
I have to admit this was my favorite part of the process. The artist in me was mesmerized at what happened with the colors right before my eyes, I truly did not know how they were going to turn out. I hope it inspires you to try painting on some chocolate! The results were magical and created the pretties mermaid tail chocolates.
Working on a baking mat or cutting board (something you don't mind getting a bit messy) place a small amount of each color of the luster dust on the board. Pour a small amount of Everclear alcohol into one of the rounds of the paint holder. Dip a medium sized paint brush into the Everclear and dip into the medium-dark luster dust color. This turns the luster dust into a paint. Brush over a couple sections of the mermaid tail chocolate, almost like you are creating wavy stripes at an angle with the luster dust. Don't cover the entire chocolate with one color as you will be repeating this step with the other colors. It will look faint, uneven and almost watercolor like at first but I promise it's going to get really pretty!
TIP: If you do not have Everclear or can't find it. You could try using Vodka. You to use something with a very high alcohol content so it evaporates quickly and leaves the color of the luster dust on the surface of the chocolate. Because Everclear has such a high alcohol content you most likely will have to purchase at a liquor store and it is generally kept behind the counter so you might have to ask for it.
Step 6: The Magic Starts to Happen
You'll continue to layer the luster dust colors a few times over the mermaid tail. The Everclear dries pretty fast leaving the pigment on the tail. While it is still a little wet you can add more luster dust to the surface of the chocolate mermaid tail. As you do this the colors will start mixing and blending together creating new colors. You can see in the above photo where I had darker colors that then got blended into light and magically purple colors appeared.
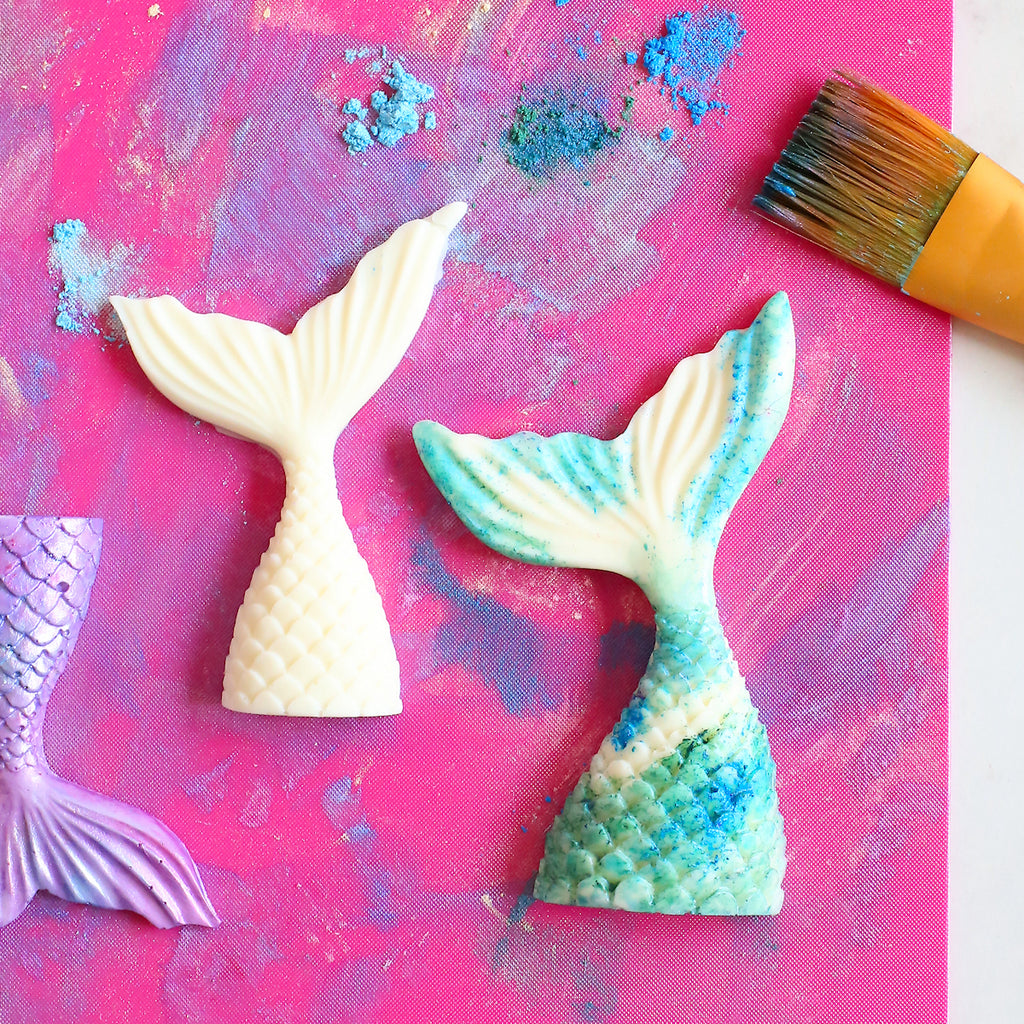
Step 7: How to Create a Teal and Green Mermaid Tail Chocolate
The first mermaid tails came out so nice we thought we'd try another color scheme so you had a couple examples of what colors of luster dusts work well together and what they can look like on a mermaid tail chocolate. For our next batch we used sky blue luster dust, spearmint luster dust, pool blue luster dust, daffodil yellow luster dust and a little of the oyster shell luster dust we had left on the mat from the purple version.
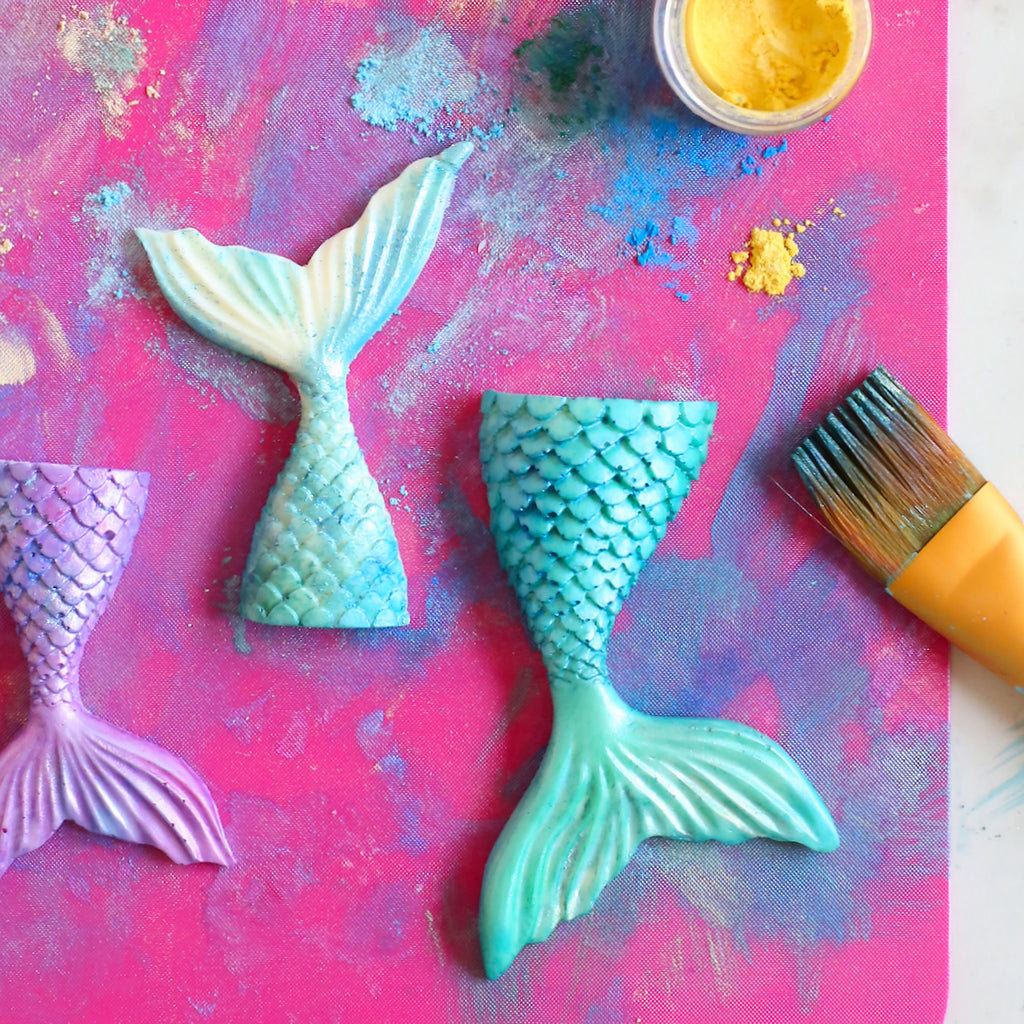
Repeat the same process of painting on the mermaid tail chocolates as described in the earlier steps. You'll see magic happen again right before your eyes and it'll make you want to keep trying other colors to see what happens...at least that's what happened to me!
Step 8: Time to Get Your Glitter On
The mermaid tail chocolates are pretty as is but everything is better with glitter right?!, especially edible glitter! Once we had all of our mermaid tails painted we sprinkled on white jewel dust® to one side of each mermaid tail to give them a little extra sparkle. And there you have it. Gorgeous mermaid tail chocolates!
We hope you enjoyed learning how to make mermaid tail chocolates! If you make them yourself we'd love to see. Tag us on social at @sprinklebeesweet so we can see and share your sweet mermaid creations! We have a few fun ways to use the pretty mermaid tail chocolates that we'll be sharing with you in our next blog post. Stay tuned and keep it mermaid sweet!
Cheers,
Esther & Shauna
This post was written, styled and photographed by Esther of the Bakers Party Shop. If you share a photo from our post a link must be displayed back to this post and credit given to The Bakers Party Shop. All photos in this post and content are copyright of The Bakers Party Shop - The Bakers Confections, All rights reserved 2018.
PS: If you enjoyed our post please share the love, pin the below Pinterest worthy photo to save for later inspiration!
How far ahead can you make these tail with dust. As well can you taste the alcohol
How far in advance can you paint the luster dust onto your white chocolate? I’m trying to get a head start on my daughter’s bday cake decorations.
Thank you! I had only made chocolates in molds once before and never did the luster. I made these for my daughter’s birthday this weekend and it was a hit!! They look beautiful!
What brand of luster dust did you use?
These are beautiful.
They are so beautiful!!! Can’t wait to try making them for my granddaughter. When you use the alcohol can you taste it?
Leave a comment