Loaded Peanut Butter Buckeye Pops
I love when accidents in the kitchen turn into something decadent. That's exactly what lead to our Loaded Peanut Butter Buckeye Pops. When I was a teenager I would make peanut butter balls around the holidays and they were one of the first things to disappear from the holiday dessert trays my mom and I would make. These remind me of them but taken to the next level!
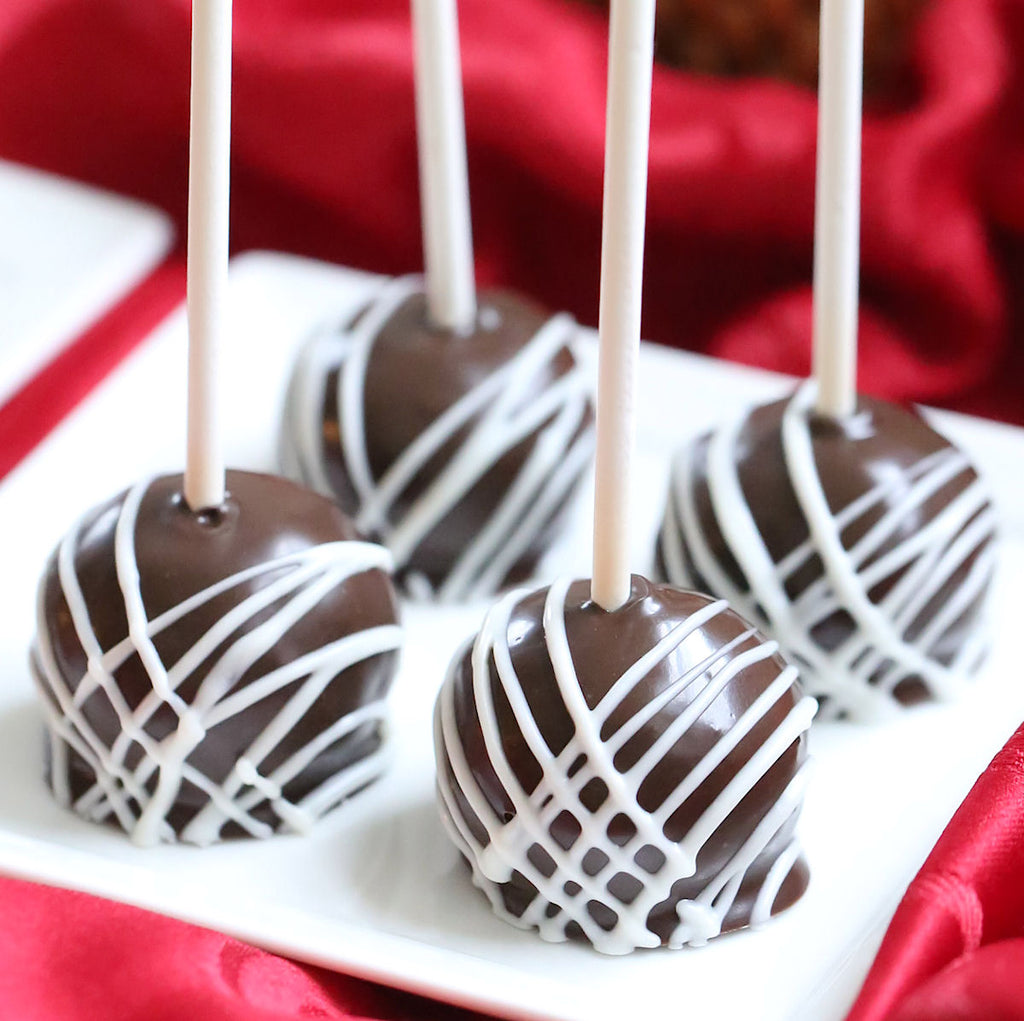
Now I am well aware that our pops don't have the traditional "buckeye" look. They looked a little funny only partially covered in chocolate with a lollipop stick sticking out. Completely covering them prevents a mishap from someone picking one up and having the peanut batter ball fall off the stick...that would not be good as these are so delicious you don't want them to miss your mouth!
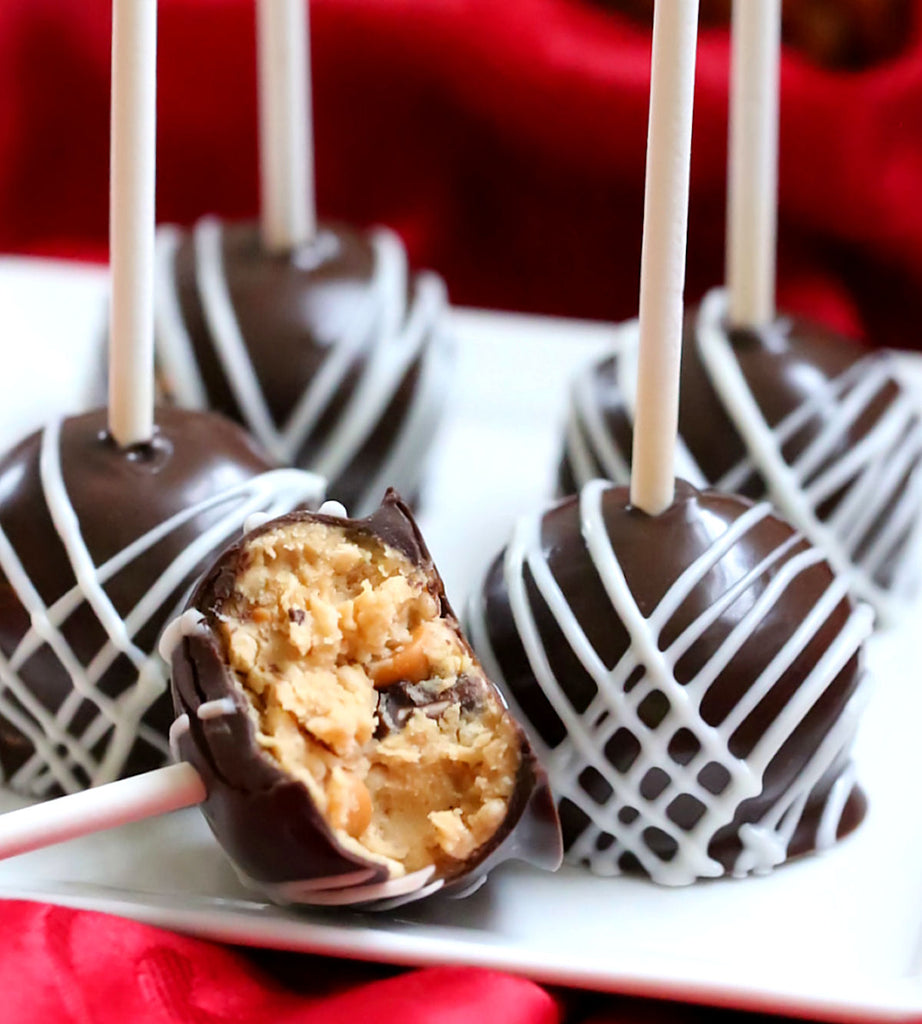
Loaded Peanut Butter Buckeye Pops:
Makes appox. 28 1" pops
Ingredients:
1 cup smooth peanut butter, we used Jiff
1/4 cup unsalted butter, unsalted
1/2 tablespoon vanilla bean paste
1/8 teaspoon salt
2 cups confectioners sugar, sifted
Mix-ins:
1/2 cup tiny crisp rice pieces
1/2 butterscotch chips
Note: you can add in whatever mix-ins you fancy, get creative! Mini chocolate chips would also be good in place of the butterscotch and crushed graham crackers might be tasty in place of the tiny rice crispies. I would recommend just keeping it to 1 cup total. You don't want the batter to get too dry since you need to be able form them into a balls.
Other supplies needed:
4.5" lollipop sticks
parchment paper
1 cup of dark chocolate to coat, we used Merken's brand
1/4 cup white chocolate for added detail, optional
Instructions:
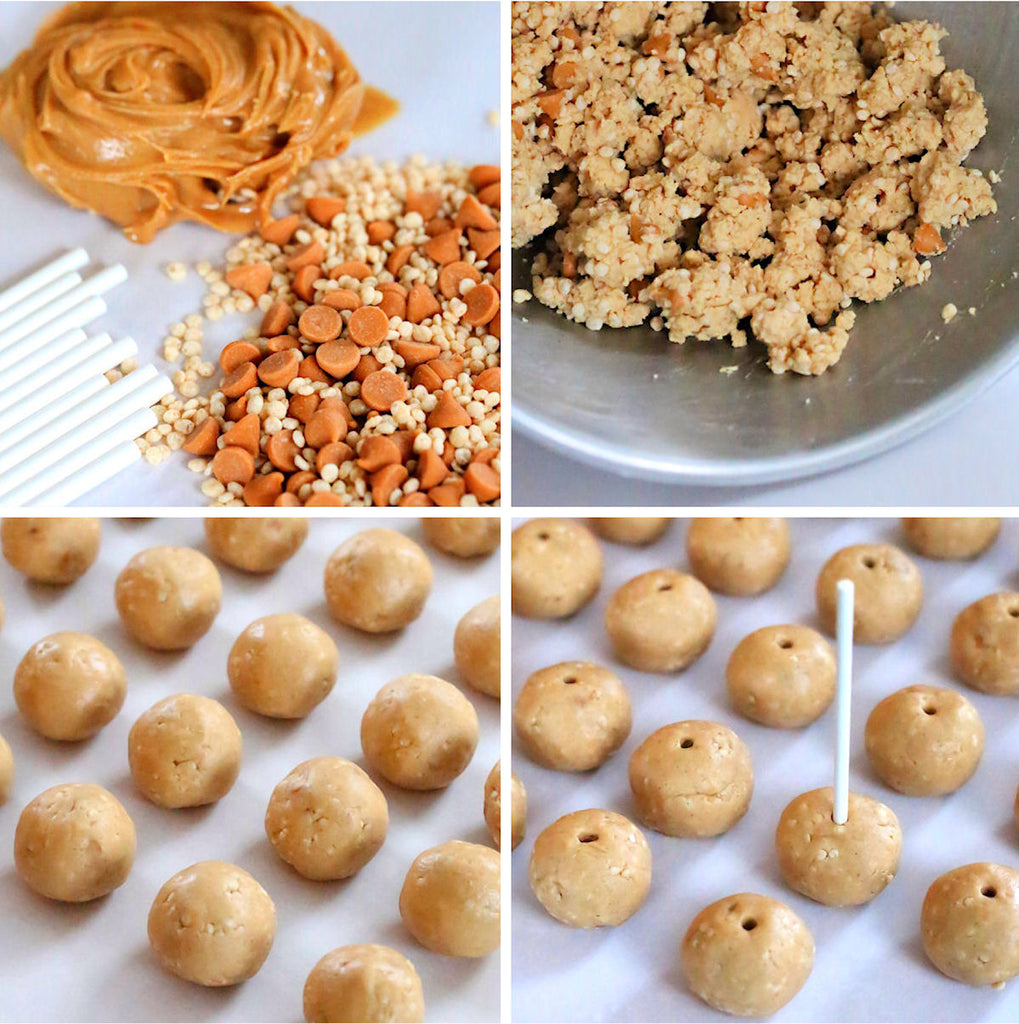
In a bowl beat the peanut butter, butter and vanilla bean paste until well combined. Add in your sifted confectioners' sugar, dash of salt and mix until combined. Fold in your rice crispie pieces and chips. Once blended it is time to form them into 1" size ball.
Using a small cookie scoop or a spoon, scoop out a small amount of dough and form your balls. Roll them between your hands and place on a sheet of parchment paper. The heat from your hands helps the balls come together. To make sure your dough is not too dry and insure they will stay together, do a test and roll one ball then insert a lollipop stick. If it doesn't crack and fall apart you should be good to roll the rest. If they fall apart you may need to add a little more peanut butter.
Once all the balls are rolled it's time to place the lollipop sticks. Melt 1 cup of chocolate in a double boiler. Dip the end of the lollipop stick in the chocolate and insert one into each pop. Allow the chocolate to set up before completely covering the ball with chocolate. This step is imperative as you don't want the balls to fall off the stick into your chocolate.
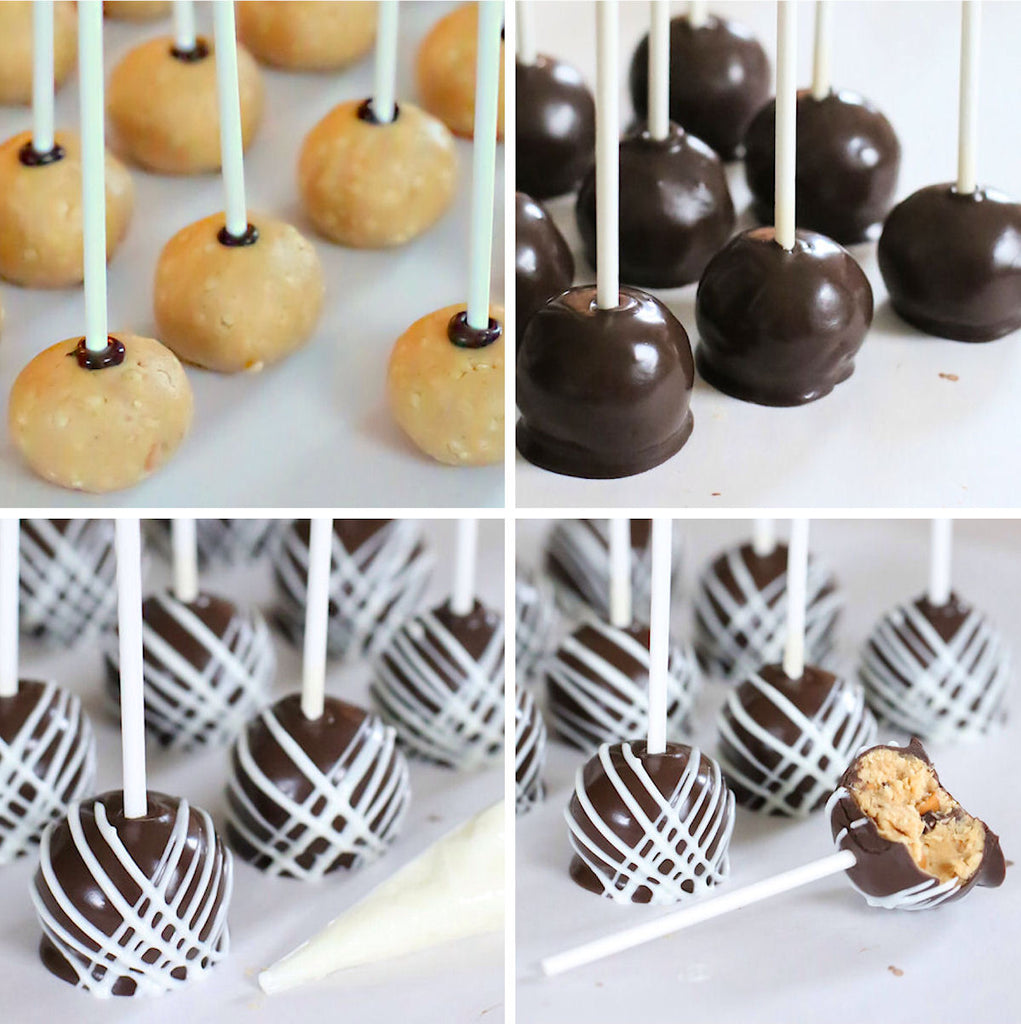
Once all the chocolate once the chocolate has set up from placing the sticks it's time to completely cover them in melted chocolate. We chose dark chocolate as the inside is pretty sweet and wanted a nice balance of flavors. We found that if you held the pop with one hand over the bowl of melted chocolate you could spoon the melted chocolate over the ball and lightly shake off the excess chocolate. Doing it this way prevented the balls from crumbling into the chocolate. Once fully covered place them back on the parchment paper and allow the chocolate to set up.
If you want to add extra detail to your peanut butter buckeye pops you can melt 1/4 cup of white chocolate and place in a disposable frosting bag. Snip a small amount off the tip so you get a fine drizzle of chocolate on your pops.
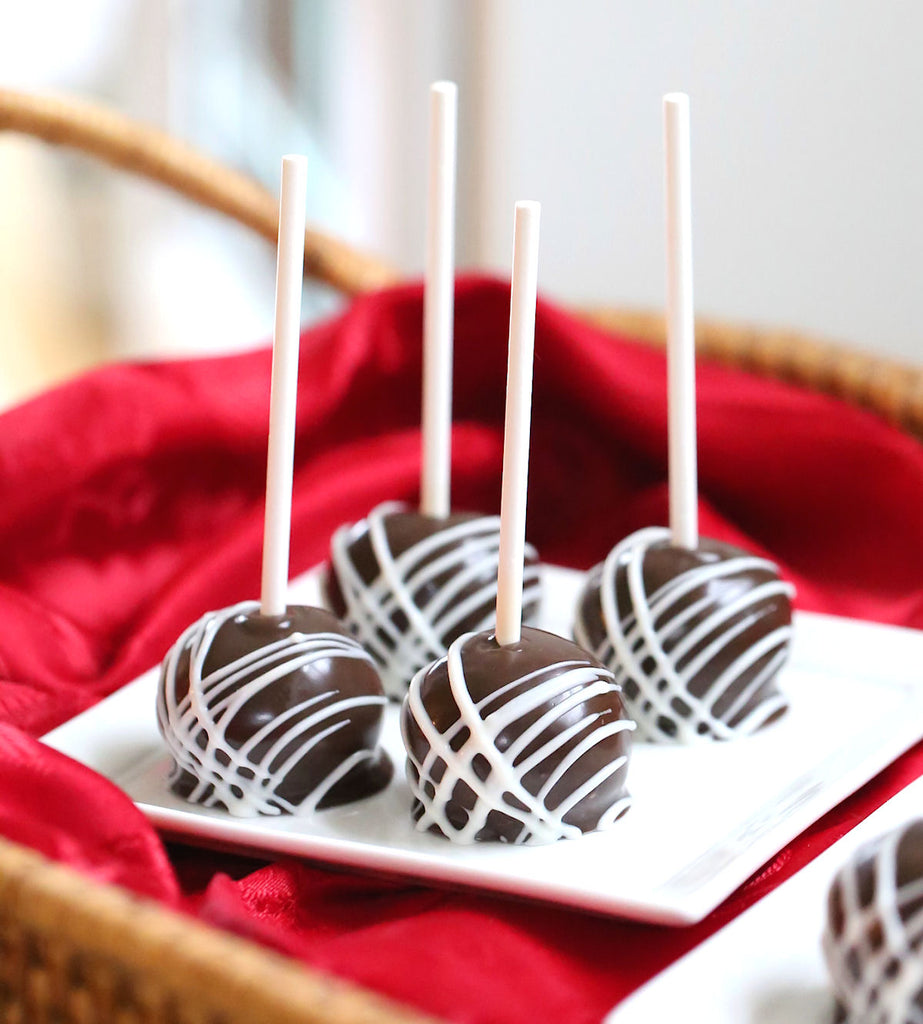
Once your Loaded Peanut Butter Buckeye Pops are finished you can place them on small dessert plates, then arrange them on a serving tray for an after dinner sweet. They could also be placed in small cellophane bags and given out as gits...Valentine's Day is coming...hint, hint! My mom took some of the samples into her work and they got rave reviews.
We hope you give them a try! If you do be sure to tag us if you are on Instagram #BPSbakelifesweet @bakerspartyshop so we can see and share your sweet creations! Save this recipe to one of your Pinterest boards for later by using the button below or click the "Pin It" button on any of our photos!
Enjoy!
Esther & Shauna
This post was written, styled and photographed by Esther of The Bakers Party Shop. If you share a photo from our post a link must be displayed back to this post and credit given to The Bakers Party Shop. All photos and content are copyright of The Bakers Party Shop & The Bakers Confections, All rights reserved 2015.

Leave a comment